Mastering Studio Lighting: A Guide to Essential Techniques
Lighting is the key to capturing stunning portraits in a studio setting. Different lighting setups create unique moods and effects, shaping the way a subject appears in a photograph. This guide explores basic and advanced studio lighting techniques that every photographer should master.
PHOTO STUDIOPHOTO
2/28/20253 min read


1. Butterfly Lighting (Paramount Lighting)
Best for: Glamorous, retro-style portraits; flattering for older subjects.
Named after the butterfly-shaped shadow it casts under the nose, this setup was popularized by Hollywood photographers in the 1930s. It highlights cheekbones while minimizing wrinkles, making it ideal for beauty and fashion portraits.
Setup:
The main light is placed directly in front of the subject, slightly above and behind the camera.
A reflector under the chin helps soften shadows on the neck and cheeks.
Effects:
✔ Creates a symmetrical butterfly-shaped shadow under the nose.
✔ Enhances cheekbones and smooths wrinkles.
✔ Ideal for glamorous and fashion portraits.

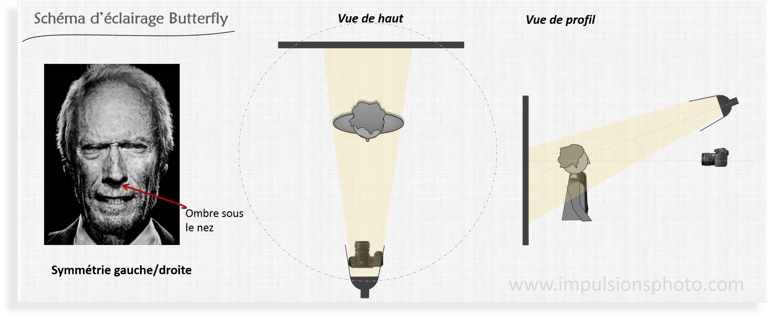
⚠ Can emphasize under-eye circles or create a hollowed look in the cheeks.
BASIC LIGHTING
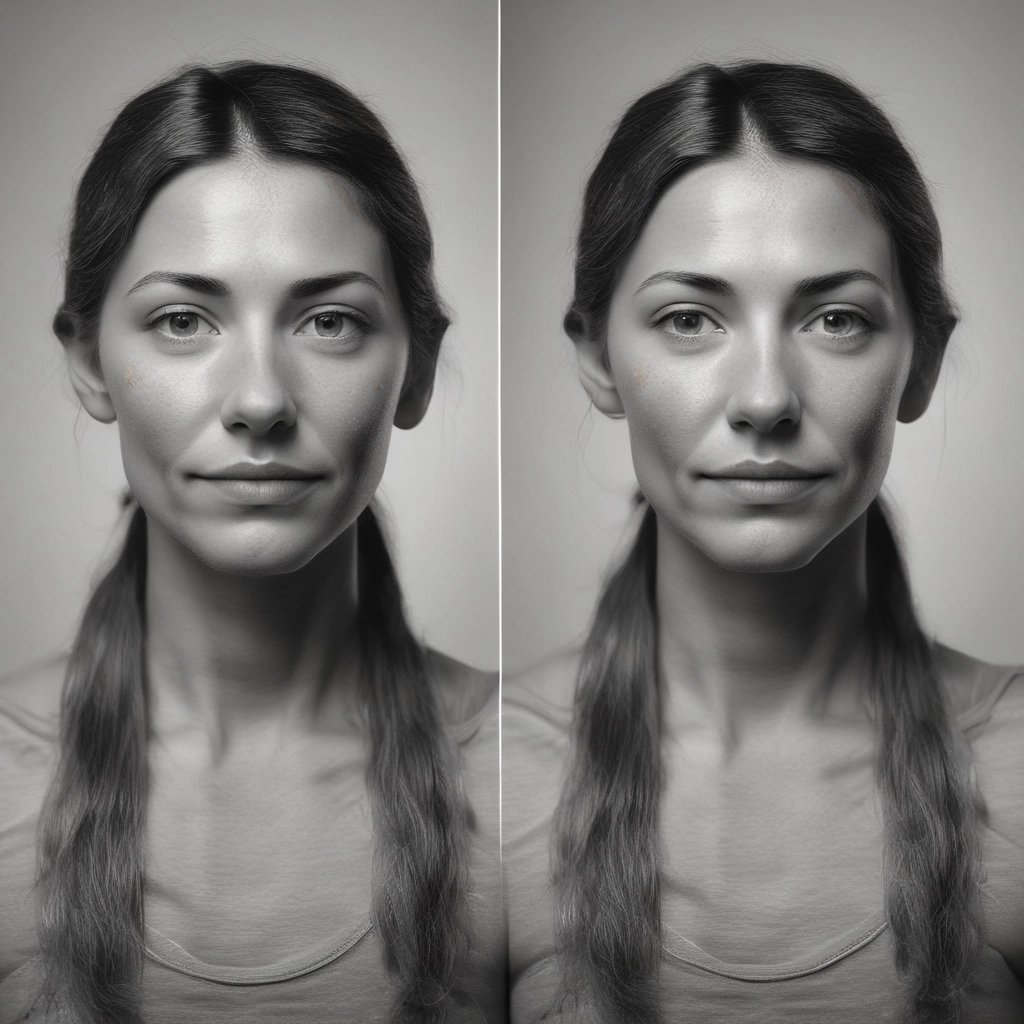
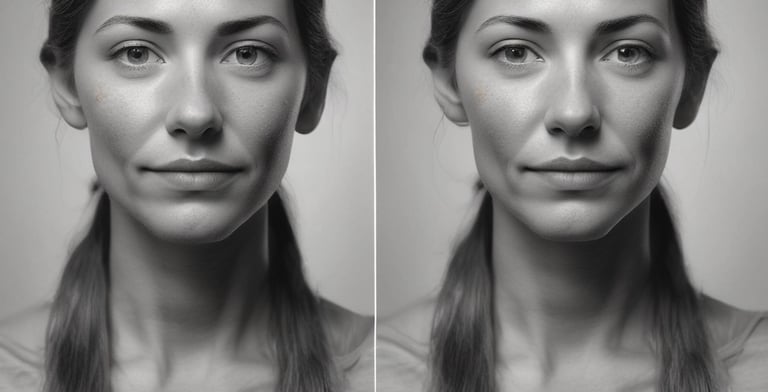
2. Loop Lighting
Best for: Versatile and flattering for most face shapes.
Loop lighting creates a small shadow beside the nose, giving depth while maintaining a natural look.
Setup:
The main light is positioned 30-45 degrees from the subject’s face and slightly above eye level.
A fill light can be added to reduce harsh shadows.
Effects:
✔ Produces a subtle shadow loop on one cheek.
✔ Adds depth and dimension without harsh contrast.
✔ Enhances the subject’s eyes with catchlights.
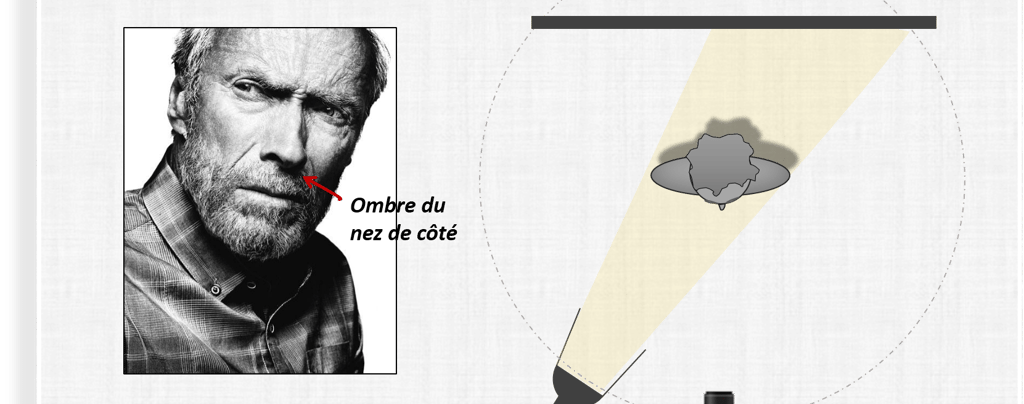
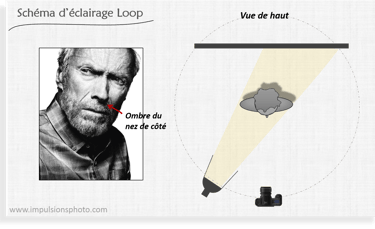
⚠ Avoid placing the light too high to prevent losing reflections in the eyes.
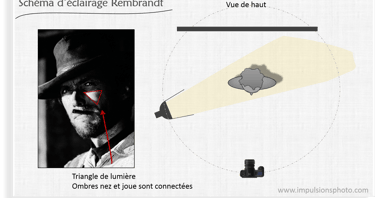
3. Rembrandt Lighting
Best for: Dramatic, moody portraits with strong character.
This technique is characterized by a triangle of light on one cheek, created when the nose’s shadow connects with the cheek’s shadow. Inspired by the paintings of Rembrandt, it’s ideal for adding depth and intrigue.
Setup:
The key light is placed at 45 degrees to the subject and slightly above eye level.
Adjust the light until the nose’s shadow touches the cheek’s shadow, forming a triangle of light.
Effects:
✔ Creates a distinctive triangle of light on one cheek.
✔ Adds drama and character to the portrait.
✔ Slims round faces and enhances facial contours.
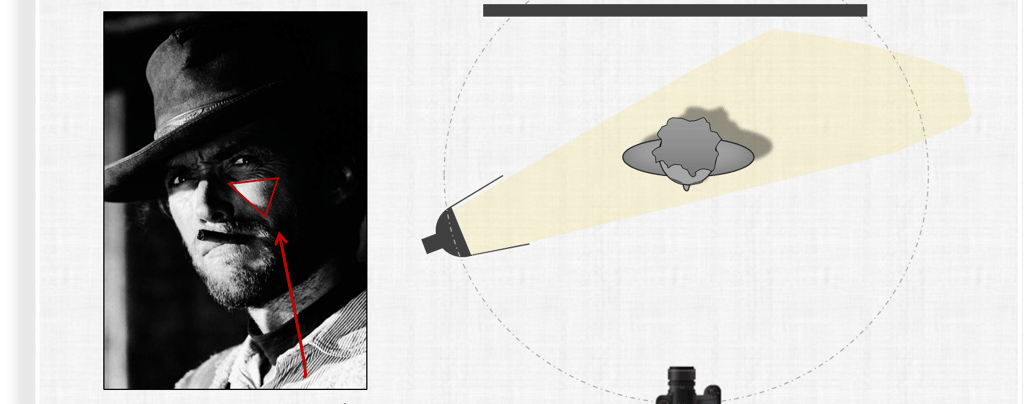
⚠ Not recommended for subjects with small or flat noses.
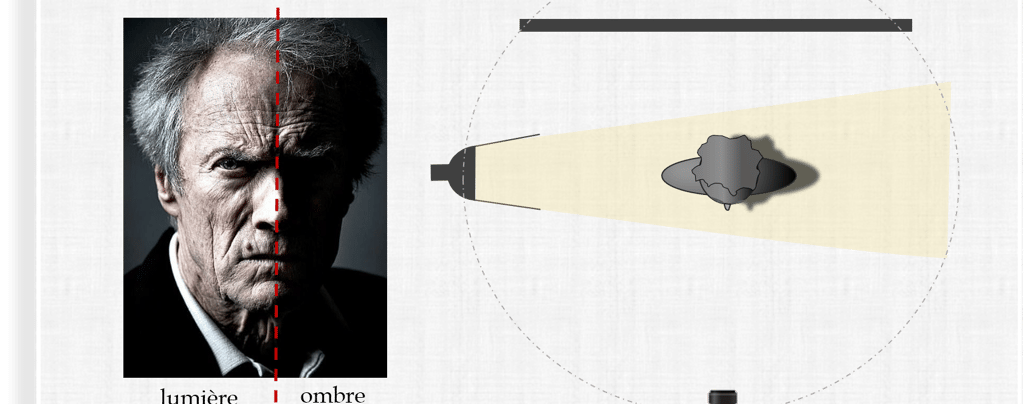
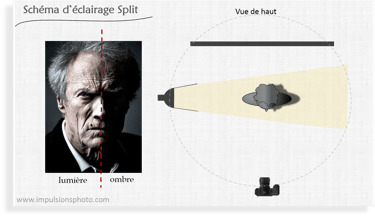
4. Split Lighting
Best for: High-contrast, intense portraits with a mysterious or dramatic effect.
Split lighting divides the face into one illuminated side and one completely shadowed side, often used in artistic or cinematic portraits.
Setup:
The main light is positioned at 90 degrees to the subject’s face.
No fill light is used for maximum contrast.
Effects:
✔ One side of the face is fully lit, the other in shadow.
✔ Creates a dramatic, bold look, often used in male portraits.
✔ Ideal for actors, musicians, and expressive portraits.
⚠ Can emphasize wrinkles and skin imperfections.
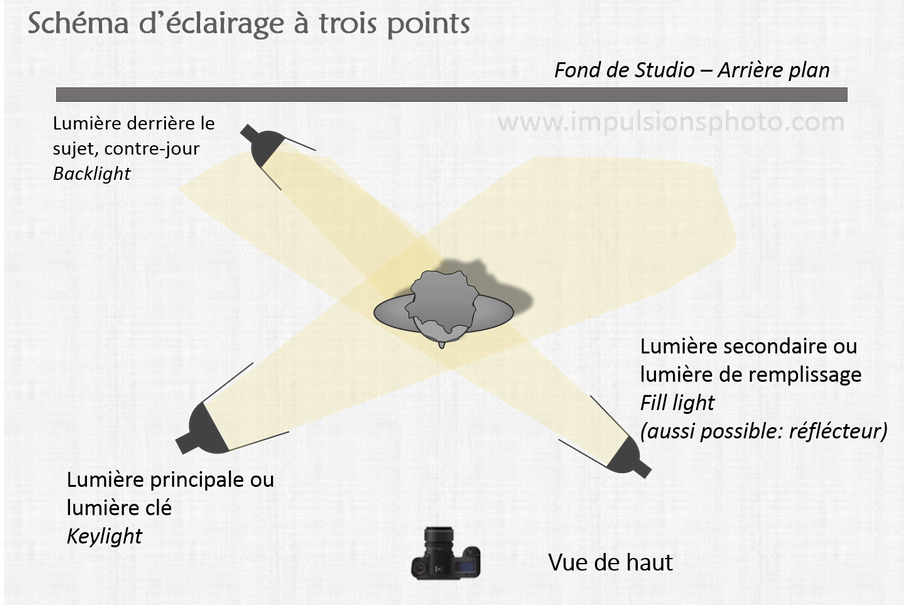
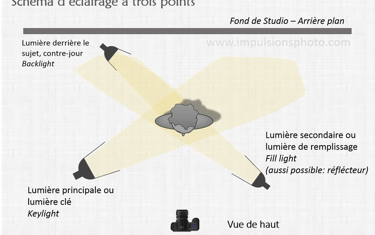
1.Three-Point Lighting
Best for: Professional, well-balanced portraits.
A fundamental setup in photography and videography, three-point lighting creates depth and dimension while separating the subject from the background.
Setup:
Key Light: The main source, slightly above eye level with a softbox.
Fill Light: A weaker light or reflector to soften shadows.
Back Light: A light aimed at the subject’s hair or shoulders to create separation.
Effects:
✔ Produces a well-balanced, natural-looking portrait.
✔ Enhances subject depth and prevents a “flat” appearance.
✔ Can be adjusted for cinematic or soft, flattering effects.
ADVANCED LIGHTING
2.Double Side Lighting
Best for: Sculptural, textured portraits.
This technique uses two equal light sources from both sides of the subject, creating a striking sense of volume.
Setup:
Two lights are positioned at either 45 or 90 degrees to the subject’s face.
Both lights should be at the same height, typically slightly above eye level.
Effects:
✔ Accentuates facial contours and textures.
✔ Produces soft shadows in the center of the face.
✔ Ideal for masculine or angular portraits.
✔ Can be adjusted for more or less contrast.
What’s your favorite studio lighting setup?
Do you have any tips or recommendations for optimizing a lighting setup?
Share with everyone your experience in the comments!
📸✨
Follow me
To stay tunned
Contacts
Email : contact@maepstudioart.com
Phone : +49 1577 5054717
COPYRIGHTS © Maë. P - StudioArt - Berlin, Germany 2026
Don't miss an exclusive shooting for you or your business


BERLIN